
In previous tutorials, we stepped through setting up the traditional Remote Desktop feature of Windows, enabled remote access via a web browser, and configured our firewall software and router to allow the connections. Finally, we can now connect!
In this tutorial, we’ll go step-by-step on how to connect to the remote computer. We’ll discover the different addresses we can enter into the client program, to establish the remote connection. In addition, we’ll figure out how to bring up the remote connection via a web browser.
Connecting to Your PC with the Traditional Client
Now you are all ready to remotely connect to your PC either from another computer on your network or from any computer on the Internet. First, we’ll connect using the traditional client program (called Remote Desktop Connection) that’s installed by default on most Windows versions. Figure 1 shows an example of the program.
You can access it from your Start menu:
Start>All Programs>Accessories>Remote Desktop Connection
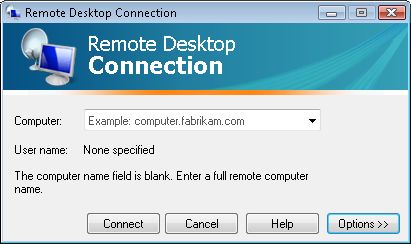
Once the program loads, you can enter the path to your Remote Desktop PC into the Computer field and hit the Connect button. It’s that simple. You have, though, a few different items you can use as a path, which include:
- Computer Name: This is the Computer Name value of the computer that Windows uses to help you identify computers on a local network. You can use this only when you are on the same network as the Remote Desktop computer; not if you are connecting from a computer outside your home or office. You can find this value on a computer by right-clicking the My Computer or Computer icon on your desktop or the Start menu, clicking Properties, and if in Windows XP, you need to click the Computer Name tab.
- Local IP Address: This number (such as 192.168.1.103) also helps identify computers on a local network, and it is used by the network components when sending and receiving data. Like with the Computer Name; you can use this only when you are on the same network. You can find a computer’s IP address by looking through the network connection status details in Windows.
- Internet IP Address: This number is the IP address of your Internet connection or modem, assigned by your Internet service provider (ISP), used to identify computers or networks on the web. This is the number you want to use when connecting to your Remote Desktop PC when away from the home or office. You can find your Internet IP address on your router’s status pages, under the WAN or Internet section, or you can google it to be detected by a Web site service. A word of caution: Your Internet IP changes, anywhere from daily to monthly, if you have a dynamic IP address. This type of address is typical on most residential, and even small business, Internet connections. You can call your ISP to see if you have a dynamic IP address or a static address.
- Domain or Host Name: If you have a dynamic IP address (or you don’t want to remember a static address), it’s best to use a domain or host name to connect to your Remote Desktop PC. This requires signing up for a service (a few free ones are DynDNS, FreeDNS.afraid.org, and No-IP) and configuring your router with your account details so your host name stays updated when your IP address changes.
Connecting to Your Windows XP PC via Web Browser
If you followed the directions to set up Web access of your Remote Desktop PC, you should now be able to bring up your computer with a Web browser. Open a Web browser, enter the URL, and hit the Enter key. The URL consists of http://YourIPAddress:PortYouChoose/tsweb/.
You only have to type colon and the port number if you changed the default port 80 to something else. If you are connecting to the Remote Desktop from a computer on the local network, you can use the PC’s local IP address rather than the Internet IP address. However, if you are connecting from elsewhere, you must use your Internet IP address. Reference the bullets in the previous section for more on these addresses as well as info on domain or host names that you could use in place of an IP address when connecting via the browser.
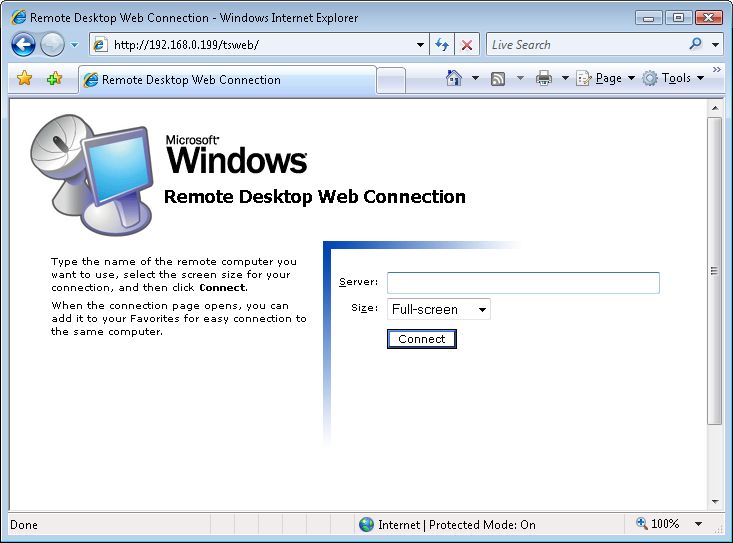
If you’re prompted to install the Remote Desktop ActiveX control, click Yes. On the Remote Desktop Web Connection page (see Figure 2) click Connect. You don’t need to fill in the Server field. If you leave the default Size set to Full-screen, it will try to use the traditional client program if it’s installed. Otherwise you’ll see the Remote Desktop screen in your browser at the size you specify.
Wrapping It Up
Now you should be able to remote into your PC from the next room or from around the globe. If you run into problems and can’t connect using the client program or the Web access page doesn’t load, double check your firewall and router settings.
We’ll leave you with a few tips to commit to memory:
- Remember your PC must be plugged in and turned on to remotely connect to it. Remember to disable any automatic sleep, hibernation, or stand-by features on your PC.
- Keep Windows up-to-date with critical and recommended updates to make sure you’re protected from the latest known security holes.
- Make sure Windows Firewall, or another third-party solution, is always on and protecting against hackers.
- Even when connecting to a PC via the Web browser, the host computer must also have the traditional Remote Desktop feature enabled.
About the Author: Eric Geier is the Founder and President of Sky-Nets, a Wi-Fi Hotspot Network. He is also the author of many networking and computing books, including Home Networking All-in-One Desk Reference For Dummies (Wiley 2008) and 100 Things You Need to Know about Microsoft Windows Vista (Que 2007).
