Revised by Steve Winograd
If you’d rather set your TCP/IP properties manually, do the following:
NOTE: These settings assume that the IP address of the LAN NIC in the ICS server is 192.168.0.1. A Win2000 ICS server always uses that address, but you can specify a different one on a Win98SE or WinMe ICS server. If the IP address of the ICS Server’s LAN NIC is not 192.168.0.1, then either change it to 192.168.0.1 or substitute the IP address that it is set to, wherever you see 192.168.0.1 in the steps below.
NOTE: You can have a mix of automatically and manually assigned client machines on your network. Because ICS’ DHCP server assigns addresses sequentially starting at 192.168.0.2 and works up, assign your manual addresses starting at 192.168.0.254 and work down.
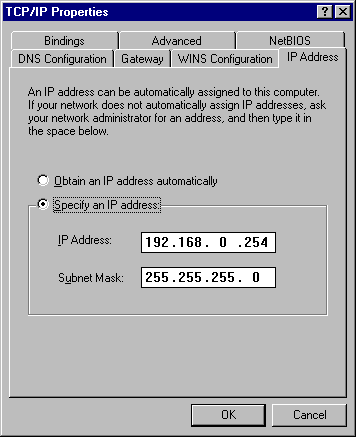
Set the client’s IP address to a unique (not the same as any other machine’s address) address from 192.168.0.2 to 192.168.0.254.
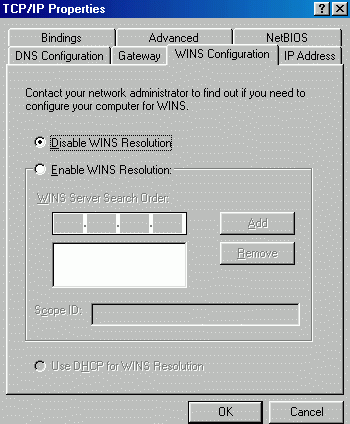
Click the WINS Configuration tab and configure it to Disable WINS Resolution.
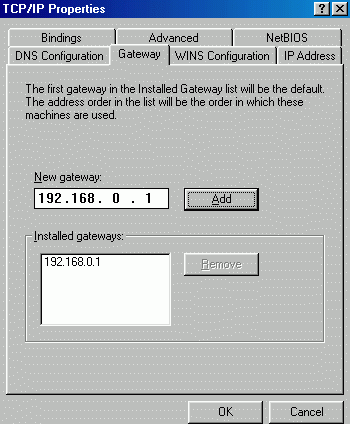
Click the Gateway tab and set the default gateway to 192.168.0.1.
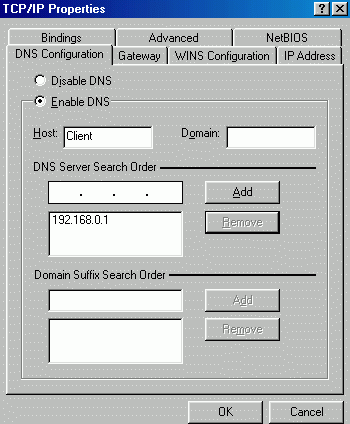
Click the DNS Configuration tab and make these settings:
- Enable DNS
- Host: Enter a unique name (usually the same as the computer name entered in the client’s Network Control Panel Identification tab).
- Domain: leave blank
- DNS Server Search Order: 192.168.0.1
After configuring TCP/IP, reboot your computer. When it comes back up, it should be ready to access the shared Internet connection.
That’s all there is to it! Enjoy your shared connection!
