
Author: Tim Higgins
Review Date: 5/2/2000
Model:DI-701 Residential Gateway
| Pros: | – Inexpensive. – Decent throughput. |
| Cons: | – No browser-based admin interface. – Windows only serial firmware upgrade. – Limited features. |
Updated 5/24/00 D-Link lowered the street price to $99 and added PPPoE capability via a firmware update.
Updated 5/13/00The DI-701 does not support PPTP clients or serving, contrary to what is stated on their web page. The review has been changed to reflect this.
The Basics
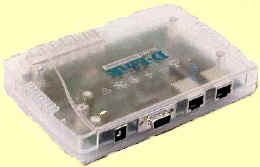
The DI-701 is packaged in a translucent plastic box. All connectors are on the rear panel of the unit, along with the power adapter input for the small 5VDC external adapter. The DI-701 has no hardware reset button.
The front panel contains the following indicators:
- Power
- Error (System status indicator)
- Internet Link / Activity
- Local Link / Activity
- Local 10 / 100
- Local Full / Half
There’s also a Green unmarked LED that blinks when the router is first powered on.
The DI-701 User / Technical Guide can be found on D-Link’s FTP site here (in MS Word format). The unit comes with a nicely done Installation Guide “poster”, printed User / Technical Guide, and CD. The CD contains a HTML version of the Installation Guide and Windows-only setup / admin program.
The router also ships with a 3 foot crossover cable and DB9M-DB9F serial cable. You’ll probably need both before you’re done setting up the router, so it’s nice the D-Link includes them. They even throw in two wall-mounting screws and wall anchors!
The D-Link Web site has a reasonably good FAQ and a FTP download area for firmware updates.
Setup
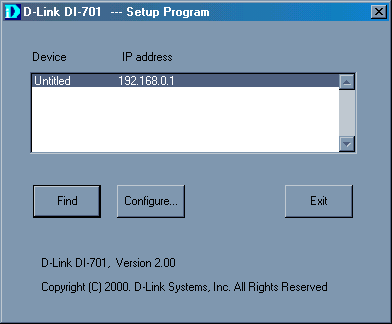
D-Link ships the router with the WAN side set as a DHCP client and the LAN side DHCP server enabled. Some users should be able to just plug the router in and go, as long as they have their computers set to obtain their TCP/IP address information automatically. If these defaults don’t work for you, you’ll find that the router doesn’t have a browser-based interface and instead sets up via a Windows-only based program, Ethernet-based Telnet interface, or dedicated serial “Console” port.
Readers of the Netgear RT311 and ZyXEL Prestige 310 reviews know that I’m not a fan of the Telnet-based setup method, and the DI-701 didn’t change my mind. The DI-701’s Telnet interface is even more bare-bones than the Netgear and ZyXEL’s and gives you only a command prompt when you connect. Fortunately, you can type “help” and get a list of commands, but you’ll need the Technical Guide to find out how to navigate the Telnet interface.
The Windows-based setup program is simple, but should be sufficient for many users’ setup needs. Check out the screen shots below for details on what you can do.
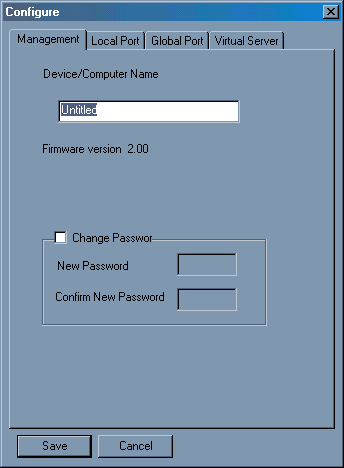

Security Note: D-Link ships the DI-701 with NO administration password, and the WAN Telnet port open. It also allows multiple users to simultaneously access the admin features.
Make sure you enter a strong password into the router during setup. This is a potentially very damaging security hole.
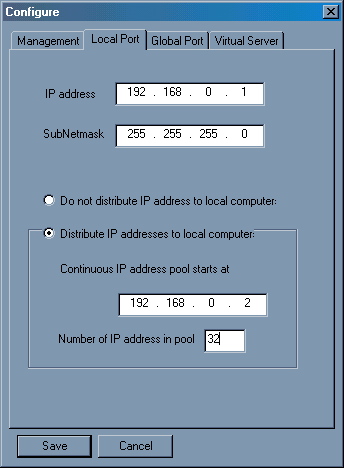
You can manually set the WAN port TCP/IP information or have it act as a DHCP client and obtain everything automatically. It’s unclear whether the DI-701 can handle “host name” authentication (like @Home uses), although you can set a router name. There’s also no support for RoadRunner TAS Authentication methods. If you’re a MediaOne subscriber whose service is tied to the MAC address of your NIC, you’re going to have fun getting the WAN port MAC address that you’ll need to install the router. The only way to get it is to connect a terminal or terminal emulator to the serial “Console” port and then reboot the router. The WAN and LAN interface MAC addresses are shown at the end of the startup selftest.
On the LAN side, you can set the starting IP and range of addresses that the DHCP server will hand out (up to a max of 32 addresses), or disable it and assign your IP info manually.
Upgrading the firmware… not for beginners!
The firmware upgrade process is the weakest point of the DI-701 and the most difficult of any router that I’ve encountered. The only way to do it is via a Windows application that requires that you use a the serial port on one of your computers and the “console” port on the router. YECH!! Not even an option to use Telnet for the upgrade. To their credit, at least D-Link provides a DB9M to DB9F serial cable to try to make this easier.
I didn’t really want to test this feature, but I had problems consistently connecting to the DI-701 via the standard Windows Telnet client. Sometimes I’d get the login prompt and the router would freeze. Other times, I could get through one or two screens, then a freeze. Once the router froze, it took a number of tries of power cycling the router in order to connect again.
The Web site FAQ mentioned a lock-up problem with the router, but attributed it to hacker attacks and suggested an upgrade to Version 2.12 firmware. However, since my router came with version 2.61 firmware (or at least that’s what the Telnet login said) I assumed that wouldn’t help.
When I finally lost the ability to Telnet in completely, however, I hauled out the serial cable, connected the router console port to my computer’s serial port and fired up HyperTerminal to go into the router directly. The login came right up (make sure you follow the HyperTerminal setup instructions on page 31 of the User Guide), so I figured I’d try the upgrade.
The good news is that the upgrade fixed the Telnet problems. But I had to open a MSDOS window and launch the upgrade program via command line instead of just double clicking on the upgrade .EXE program. This is because the program defaults to using COM2 and I was using COM1. You also need to power cycle the router after you start running the upgrade program and it took a few tries for the upgrade program to see the router. Sounds like fun, huh?
Advanced Features
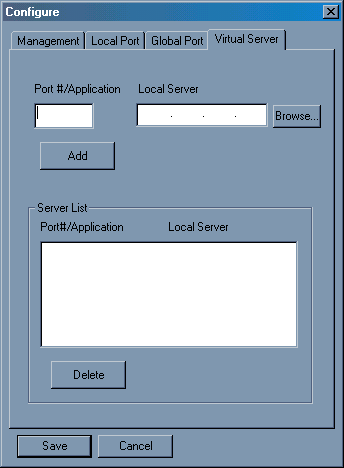
The DI-701 doesn’t let you do much beyond basic routing and DHCP serving. About the only thing you can do is set up 12 port to IP mappings. You can’t set port ranges and can’t specify TCP or UDP protocols. Most similar products allow you to get by the no port range limitation by designating one IP address to be placed outside the router’s firewall. This is commonly known as a “DMZ computer”. The DI-701 doesn’t have this capability, however.
A nice surprise!
Given the price point and limitations of the DI-701, I didn’t expect much in the way of routing speed. But when put through our usual speed test, the DI-701 pleasantly surprised me!
WAN to LAN routing measured in at about 3.8Mbps, which is among the faster routers. When I ran a LAN to WAN check, I got a slightly slower 3.3Mbps, but this was probably due to my slower LAN based machine. So I’d judge the routing speed to be the same in both directions, and fast enough for most cable/DSL connections.
Limitations
The DI-701 has the following additional limitations that may prevent you from using it as a solution to your Internet sharing needs. Many are common for routers in this price range:
No filtering for content, IP, or port number.
No user access control.
No PPTP or IPSec VPN server or client support.
No support for Static routes or RIP routing protocols.
No logging.
No support for Roadrunner TAS login protocol
Summary
The DI-701 has an attractive low price and good throughput, but you do give up some of the features that you’ll find in more expensive products. It will handle clients running Windows, MacOS, Linux and any other OS that supports TCP/IP. However, since the setup and firmware upgrade programs run on Win95/98/NT only, users without a Windows machine available could run into problems configuring and upgrading the unit.


