
The MMR uses Vicomsoft’s Internet Gateway (VIG) to handle the actual routing. It’s not free ($99 for 5 users), but it has two features that make it relatively simple to use as the heart of the MMR:
It can handle routing among multiple networks
It includes a NAT router for sharing a single ISP IP address.
There are other products that can handle routing among multiple networks besides the Vicomsoft products:
Windows Me’s Internet Connection Sharing (ICS)
Tiny Software’s WinRoutePro [Thnx Juda Vecht!]
The procedure that follows, however, is based on the Vicomsoft product. The screen shots are actually from VIG’s predecessor, Soft Router Plus, so your screens may look different.
VIG has a number of other features, such as logging, filtering, access controls, a caching server, and others. We won’t be investigating those features in this article, but rest assured that VIG can more than handle the job.
VIG comes with an installation Wizard, but it’s just as easy to do the job manually. Note that the screen shots shown are from Version 6 of VIG. The current version is 6.6, so your screens might look a little different. Let’s start by configuring the ISP port, i.e. the one that connects you to the Internet. If you connect to the Internet via Dialup modem, just continue reading. If you use a cable modem or other method that connects via an Ethernet card, go to this section.
ISP Port Setup – Dialup |
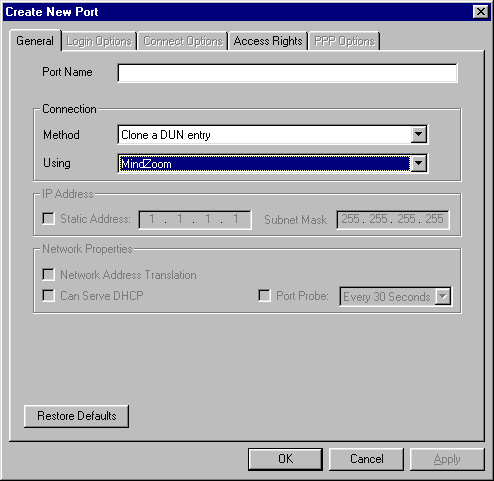
1) Start VIG and bring up the Status View. Go to the Menu bar and click on Ports and select New Port.
2) If you are using a Dialup modem, you’ll already have a Dialup Networking profile for your ISP. Change the Connection settings as shown below, where the Using box is set to the DUN profile that you want to use.
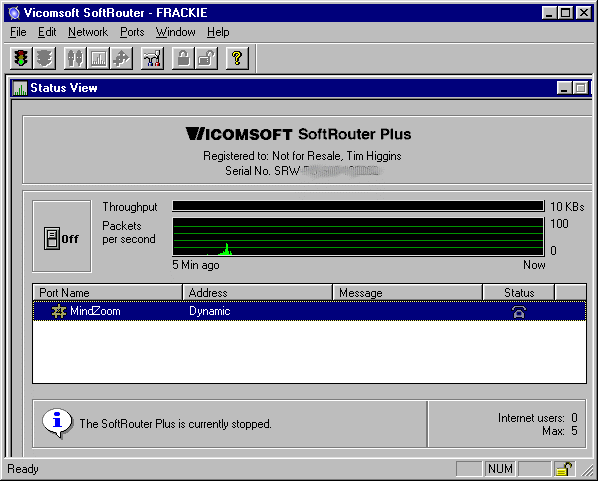
After you click the OK button, your Status View window will look like this
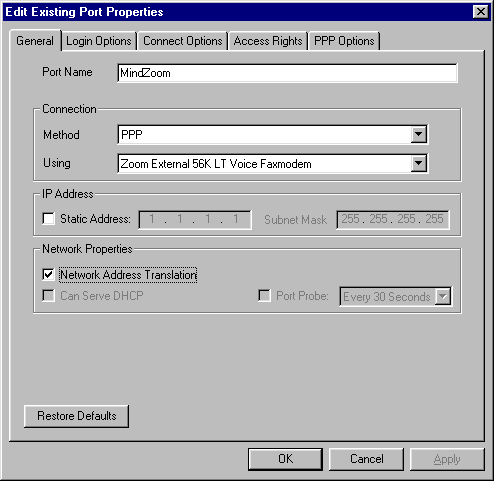
3) Double-click on the Port to reopen the Port properties window, and check the Network Address Translation box in the Network Properties section. While you have this window open, click on the Login Options tab and verify that the login information looks correct.
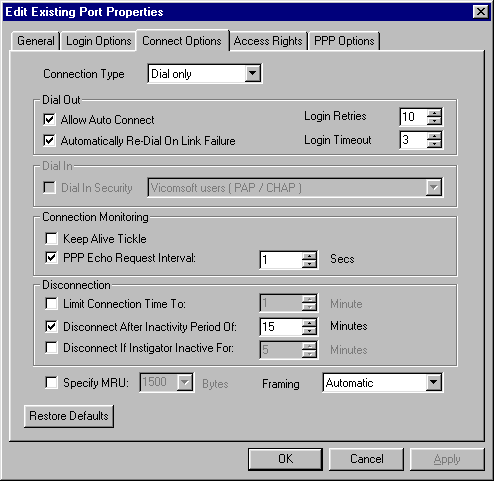
4) Click the Connect Options tab and change any of the settings if they don’t meet your needs. Consult the VIG User documentation if you need to know what the settings do. I changed my settings as shown below. Your settings can be different.
That completes the setup for the ISP Port.
ISP Port Setup – Cable Modem (or other Ethernet device) |
If you are using a cable modem or device that connects via an Ethernet card, you should use the following settings when creating a new port instead of the settings above.
1) Start VIG and bring up the Status View. Go to the Menu bar and click on Ports and select New Port.
2) Set the Port settings as shown below, where the Using box is set to the Ethernet adapter.
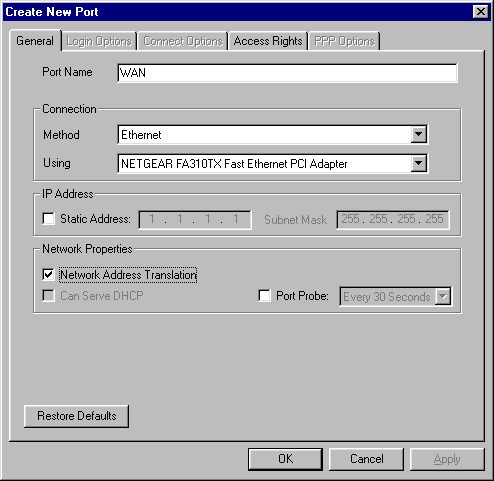
3) The above settings assume that your ISP is using DHCP to assign your IP address. If that’s your setup, click OK to save the settings and you’re done and you can go to setting up the LAN ports. Otherwise, continue with Step 4.
4) If your ISP assigned you a static IP, check the Static Address box in the IP Address Section and enter the IP address and Subnet mask.
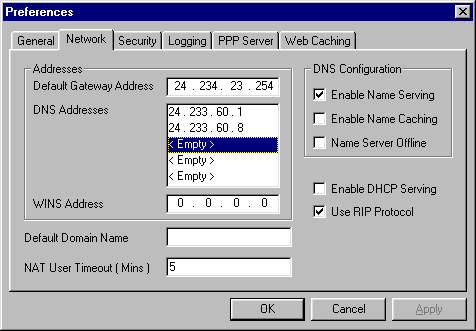
5) You’ll also need to enter a Default Gateway and DNS Servers. Go to the Edit Menu, select Preferences and click on the Network tab. Enter the IP addresses for the Default Gateway and DNS servers that your ISP has given you. The addresses in the window shot below are examples. Your addresses may be different. Click the OK button to close the window when you’re finished.
That completes the setup for the ISP Port.


