
The LAN port setup is very similar to the ISP Port setup.
Our example network has two LAN segments: Ethernet and Wireless. The setup is the same for each one, the only difference being which adapter you choose for the port.
1) Bring up the VIG Status View. Go to the Menu bar and click on Ports and select New Port.
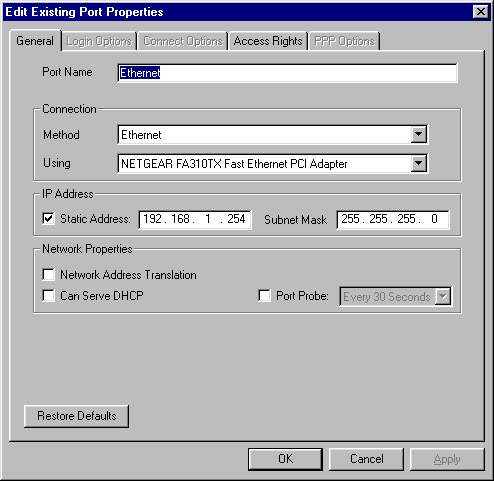
2) Set the Port settings as shown below, where the Using box is set to the Ethernet adapter that connects to your LAN. Make sure Network Address Translation and Can Serve DHCP are NOT checked in the Network Properties section. The Static Address of 192.168.1.254 will be set automatically. Click OK to save the Port.
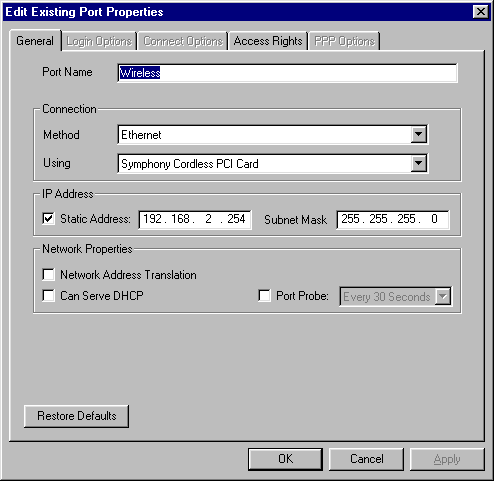
3) Go to the Menu bar again, click on Ports and select New Port. Set the Port settings as shown below, where the Using box is set to the Wireless (or Phoneline) adapter that connects to your LAN. Make sure Network Address Translation and Can Serve DHCP are NOT checked in the Network Properties section. The Static Address of 192.168.2.254 will be set automatically. Click OK to save the Port.
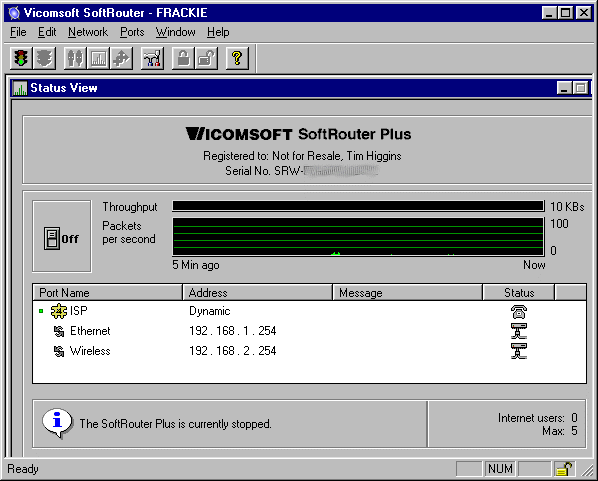
When you’re finished, your Status View will look similar to this.
NOTE that your ISP port may look different, depending on what you named it and what method you are using to connect to the Internet. This window shot shows a Dialup (PPP) port named ISP.
That’s it for the LAN Port setup!


