 And Make It Much Faster!")
Is there anything worse than dealing with a slow laptop?
We’ve all been there.
You try to get some work done or browse the web, but even launching a single program seems to make your computer run at a snail’s pace. We’re not talking about issues with your network here. Those are relatively easy to solve. It’s the performance-based problems that cause the biggest headaches.
It doesn’t matter whether you’re running the newest operating system, Windows 10, or even Windows 7 from multiple generations past. You don’t have to settle for poor laptop performance!
Before you ditch your device for a pricey new laptop, there are ways to speed things up. Sometimes, some technical work, decluttering, and updates can make a world of difference. Best of all, these steps won’t cost you a penny!
In a hurry?
So, what if you are too busy to troubleshoot? Well, then I would highly recommend iolo System Mechanic, our top pick for enhancing and sustaining your PC’s speed automatically.
It can help keep your machine sharp, while you get on with more important things.
Here’s why we appreciate System Mechanic so much:
- Deals with housekeeping tasks, like eliminating unnecessary files and freeing up space.
- All packages work in real time to enhance CPU, RAM, and hard drive performance.
- Detects and removes unwanted programs that slow down your system’s start-up speed.
- Monitor and fixes thousands of known issues that could lead to errors or performance degradation.
- It can improve internet speeds & fix known Windows vulnerabilities.
Check out iolo System Mechanic here. They even offer a 30 day money back guarantee.
Here are some ways you can speed up your slow laptop for free.
1. Update Your Operating System, Software, and Drivers
There’s a good chance you’ve seen those notifications about system updates pop up. The Windows OS does an excellent job of letting you know when updates are available. Most programs and drivers will send messages, too. If you have a habit of delaying updates, now is the time to let your laptop do what it needs to do.
Updates exist for a reason! They keep your laptop up to date on all security threats. Not only that, but updates take care of bugs and performance issues. While constant updates can be annoying, they’re good in the long run.
If you don’t see any notifications, you can check for updates manually. All you have to do is navigate to the “Start” menu and click on the “Settings” button.
There, you’ll find the “Updates & Security” icon. Click on it, and navigate to the “Windows Updates” tab on the left-hand side.
You can click the “Check for Updates” button, and Windows will look for anything available. Initiate the download and sit back. Updates can take a while, so it’s a good idea to let the laptop do its thing at night when you’re not using it.
Driver updates are usually part of standard Windows updates. But, you can manually update them, too. Back in the “Settings” menu, go to the “Devices” screen. Here, you can select a category and see the names of devices.
Right-click on the one you want to update and select “Update Drivers.”
2. Restart Your Laptop
I know what you’re thinking: That’s it?
Believe it or not, sometimes restarting your laptop gives your PC’s performance the boost it needs! So many people leave their computers running 24 hours a day that it never has a chance to reset. But here’s the thing: Most updates need a fresh reboot for the changes to take effect.
Not only that, but a restart can shut down any programs or operations that are stuck in limbo.
3. Scan for Malware
You’d be surprised by how much malware can affect system performance. Many people hear the term “malware,” but not everyone is familiar with what it actually is. Malware is simply a catch-all term to describe any malicious program that’s purpose-built to do some harm to your laptop. It could be a virus, a Trojan, adware, or any other type of program you didn’t intentionally install.
Most malware will hog resources, causing your laptop to feel super sluggish no matter what you do. If you suspect that’s the case, it’s time to do something about it!
Here’s where your antivirus comes in. Hopefully, you already have one installed. Open up the software and perform a quick scan.
If you don’t have antivirus software (you really should), you can use the one built into your operating system. Windows has a handy scanner tool. To use it, head into the “Settings” menu.
Click on “Privacy & Security,” then go into the “Windows Security” page. This page will give you an overview of how secure your laptop is. If there’s an issue, you’ll likely see it here. However, you can perform a manual scan by clicking on the “Open Windows Security” button.
Navigate to the “Virus & Threat Protection” button on the side and hit the “Quick Scan” button. This will initiate a malware scan. If you find something, address it immediately. Getting rid of malware will not only optimize your laptop’s performance, but it’ll keep your private data much safer.
4. Tweak Your Power Settings
Did you know that your laptop has multiple power options? This unique feature helps strike the right balance between power consumption and CPU performance. It’s a valuable touch that can make a world of difference if you’re running low on power and don’t have access to recharge your battery.
By default, Windows laptops are set to a balanced setting. But if you’re dealing with slow performance, changing it to a high-performance option can make a huge difference.
To make these changes, go into the “Control Panel.” From there, click on “Hardware and Sound,” then “Power Options.” Click on the button that says “Create Power Plan.”
In this window, you can select between three options: Balanced, Power Saver, and High Performance. We recommend going with the latter to optimize CPU processes and keep your system running smoothly. You can also fiddle with more advanced settings and create a custom mode if you want.
5. Change Graphics and Animations Settings
Microsoft has done a lot to create a stunning version of Windows. Unfortunately, those fancy visual effects are also eating up your RAM CPU. If you want the best performance possible, turn them off! Pretty visual effects are nice to look at, but they should never sacrifice your device’s performance.
Luckily, Microsoft makes it easy to turn the fluff off. Once again, head back into the “Control Panel” window.
Now, click on “System and Security, “System,” and “Advanced System Settings.” It’s a bit of a deep dive, but trust us, the improvement is worth it.
In this window, find the “Performance” section, and click on “Settings.” You’ll find a slew of options that you can fine-tune.
To keep things simple, there are a few preset choices. You can try the “Adjust for Best Performance” option. Or, you can customize the graphics and animations as you see fit.
In Windows 7, these settings are on the “Performance Information and Tools” page. You can use the search box to get to it!
6. Get Rid of Unused and Unnecessary Files
Are you a digital hoarder? Don’t worry; it happens to the best of us! It’s easy to hold onto files when they don’t take up any physical space. But like that junk in your closet, it pays to cleanse yourself of all the unnecessary clutter.
Take some time going through old files and delete anything you don’t need. Make sure to follow up by emptying your recycling bin, too.
Turn regular digital housekeeping into a habit. Spend time each week to keep things organized and clutter-free.
This isn’t about keeping your laptop tidy. Too many junk files can make your laptop run slower, too. Standard HDDs start to lose efficiency when they reach 90 percent full. You should never fill your hard drive past the 75-percent mark as a good rule of thumb. Doing so will only cause your performance to dip significantly.
If you have to keep old files, move them to an external drive for safekeeping.
7. End Resource-Hogging Programs
Let’s face it: Some developers aren’t super concerned with creating light apps that don’t affect your computer’s performance. There’s nothing wrong with that, as some programs simply require more resources to run. However, you should always ensure that none of those resource hogs are running in the background. If they are, don’t be surprised when your laptop slows down to frustrating speeds.
You can easily see what programs are causing issues. All you have to do is launch the “Task Manager,” which you can do by right-clicking the taskbar. Once you launch the “Task Manager,” click on the “Processes” tab on top.
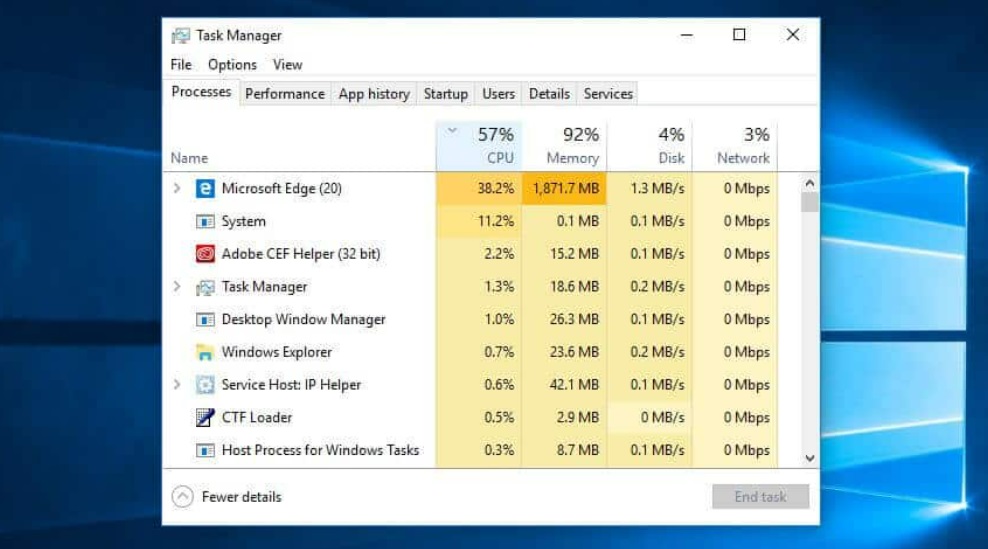
If you’ve never used this feature before, it’s about to become your new best friend! This window shows you exactly how much CPU, memory, and disk space a program is utilizing. It changes in real-time, and Microsoft color-codes everything so that you can find the culprit that’s causing performance issues.
To end a resource-hogging program, highlight it and click on the “End Task” button on the lower right-hand side of the screen. With that, you should free up a lot of processing power!
8. Uninstall Old Programs You’re Not Using
While you’re checking how programs affect your laptop, you can get rid of unused programs. Some software takes up a significant amount of space and uses all kinds of resources. Even if you’re not actively using it, the program can cause trouble through poor performance optimization. If you’re not using it, why sacrifice performance?
There are a couple of ways to uninstall a program. You can easily navigate to its files and find the uninstaller. Or, you can use the “Programs and Features” window. It’s in the “Control Panel” under the “Programs” menu.
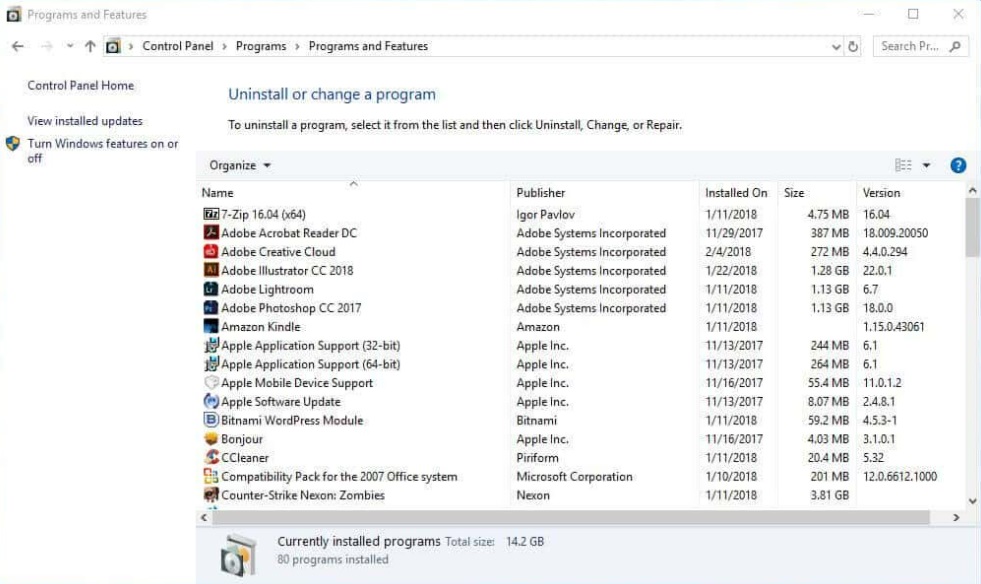
This window shows you every piece of software you have installed. It also shows you how much space it takes. To uninstall a program, right-click it and select the option.
9. Ditch Unused Browser Extensions
Your web browser is probably one of the most-used pieces of software on your laptop. It’s only natural to customize it to meet your needs through extensions and other features. Whether you use Internet Explorer, Chrome, Mozilla Firefox, or any other browser, it’s better to keep things as light as possible.
Extensions might as well be small programs that run in the background. They eat up resources just like any other process. Having a ton of them stacked into your browser is just asking for trouble. Find your browser’s preferences or settings page and do some work cleaning things out. It usually only takes a few minutes, but the difference it makes is impressive.
10. Perform a Disk Cleanup Process
Over time, your hard disk accumulates a lot of junk. You can inadvertently install cookies or create temporary files even with light use. All that stuff takes up space and causes a dip in laptop performance.
One of the easiest ways to optimize your device is to perform a disk cleanup. You’ll free up some disk space and eliminate all the clutter in one process. It’s a win-win!
To perform a disk cleanup, head into the “Control Panel.” Then, click on “System and Security” and “Administrative Tools.” Finally, scroll down and click on the “Disk Cleanup” option from the list.
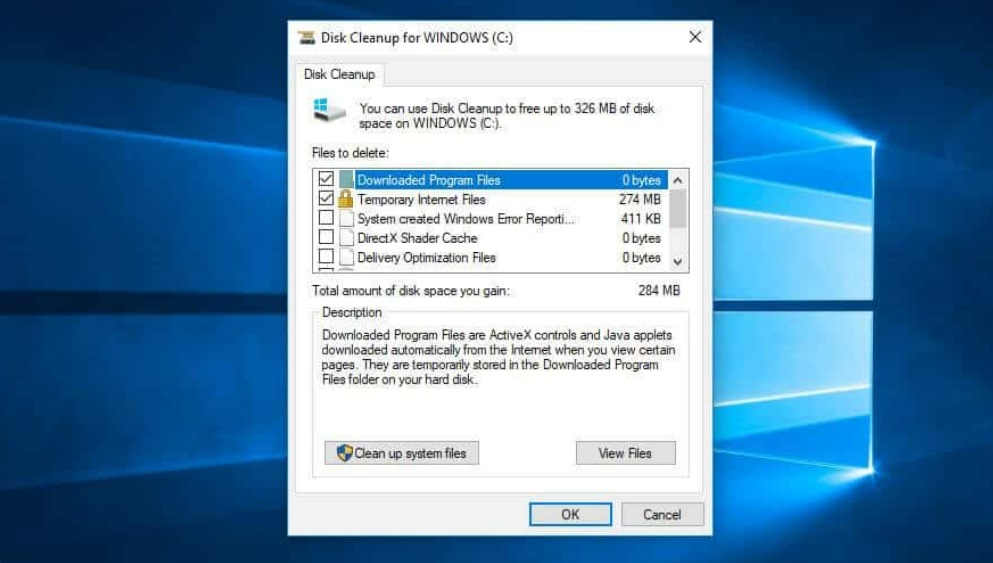
The Disk Cleanup window gives you a range of options. Check and uncheck boxes to select what types of files the process will delete. You can choose temporary files, downloaded program files, and more. Once you’re ready, click on the “OK” button and wait. You can also use the “Clean Up System Files” option to choose the system files you want to eliminate. Both operations can make a big difference!
11. Prevent Programs from Running at Startup
Startup processes can be a huge nightmare! Think about all the time that’s wasted when you boot up your laptop. With each restart, you must wait for a myriad of processes to complete before you can do anything. But even after that’s done, they can use up so many resources that your performance comes to a slow crawl!
Some startup programs are necessary. For example, we always recommend keeping your antivirus going to stay safe. But everything else? There are many processes you can stop to speed your laptop up considerably.
Go into the “Task Manager.” You can do that by right-clicking the taskbar. Alternatively, you can press CTRL, SHIFT, and ESC keys together will launch it automatically.
Instead of looking at the “Processes” tab like earlier, head into the “Startup” section. Once again, the “Task Manager” comes in to save the day!
Take a look at the laundry list of processes in the startup tab and determine which ones are unnecessary. Deciding which options are unnecessary programs might involve some trial and error. Like we said before, some select tasks are necessary. When you find the ones you can live without, right-click it and hit “Disable.”
Don’t worry: This process doesn’t delete anything. It simply prevents the program from running automatically the moment you turn your laptop on. If you still need the software, you can run it manually.
12. Stop System Tray Operations
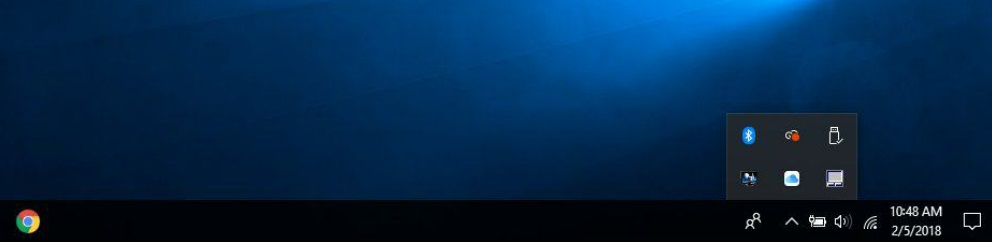
This tip to make your laptop faster is pretty similar to the previous one about startup processes. The Windows system tray provides quick access to important functions. It’s on the far right of the taskbar and consists of several small icons. Clicking the upward-facing arrow will unveil even more icons representing what’s going on in the background.
You might see icons for your printer, your monitor, and even your antivirus software. If you see something running that you don’t need, right-click it and close them out! Once again, ending the process doesn’t delete the software. It’s still there when you need it, but closing the program out will save you valuable resources.
13. Turn Off Some Windows Features
Here’s another quality of the Windows operating system that can be beneficial in the right circumstances. Many Windows features run in the background to provide assistance at a moment’s notice. Once again, some are necessary, and some are only hogging resources.
One example is the “Tips” feature. Essentially, Windows analyzes what you’re doing and provides pop-up tips and tricks to help you make the most out of your laptop. When you first use it, the feature can come in handy. But it’s mostly a resource-hogging headache after that.
To turn this and other Windows Features off, go into the “Programs and Features” window from the “Control Panel.” On the left side of the screen, you’ll see a link that says “Turn Windows Features On or Off.” Clicking on that will bring up a new window with the various features running in the background.
To turn something off, simply uncheck the box next to it.
14. Disable Cloud Syncing
Windows 10 has cloud-based storage built right in. You can use it to backup files and free up some storage space on your hard drive. It’s pretty handy when you’re in a pickle, as it keeps your files safe even if your laptop is destroyed.
Unfortunately, it can also eat up resources. You see, Microsoft’s OneDrive platform regularly syncs files in the background to ensure that everything is current. It happens automatically, which can make your laptop feel sluggish at times.
Turning it off can fix the issue and make your laptop faster. Just remember: You won’t have the peace of mind that comes with regular automatic backups! You’ll have to remember to do that part yourself manually.
To turn off syncing, right-click the OneDrive icon. It’s usually in the system tray, which is on the right side of the taskbar. In the window that pops up, click on “More.” This launches a smaller menu that provides options for syncing. You can click on “Pause Syncing” to stop the process immediately. For more control, head into OneDrive settings and tweak the automatic feature.
Similar syncing operations exist with third-party cloud services. Make sure to uncheck those if you have performance issues already.
15. Turn Cortana Off
Ah, Cortana: Microsoft’s remarkable voice assistant feature! Cortana can be a fantastic piece of software that simplifies your life. However, it’s also a point of controversy for many. Not only does it eat up some valuable resources, but many believe that Cortana also poses a security threat.
If you’d rather boost performance than take advantage of Cortana, you can turn her off. There are a couple of ways to do this. The first is to launch Cortana. Click the “Settings” button in the window that pops up. Slide the switch under the “Cortana” menu to turn the feature off.
Another way to turn Cortana off is to go into the “Settings” menu and navigate the “Privacy” window. Then, click on “Speak, Inking, and Typing.”
A whole section titled “Getting to Know You” will appear. At the bottom of the text, there’s a button labeled “Stop Getting to Know Me.” Clicking on that disables Cortana. Not only that, but it also deletes any data the voice assistant already gathered.
16. Defragment Your Hard Drive
To defragment your hard drive is to improve how it accesses files. Over time, files can become fragmented. Instead of appearing on your disk as one continuous data string, the bits and pieces get separated. As a result, your computer has to jump around and find everything just to run things smoothly. As you can imagine, it slows things down quite a bit.
Defragmentation puts everything back together, which can optimize performance. There’s no need to defragment an SSD. But if you have an HDD, we recommend doing it regularly on a schedule.
To start the defragment process, go into “My Computer.” Now, right-click onto your main hard drive. Usually, it’s labeled “Windows (C:).” In the menu that appears, head into “Properties,” then “Tools.” Click on the “Optimize and Defragment” option.
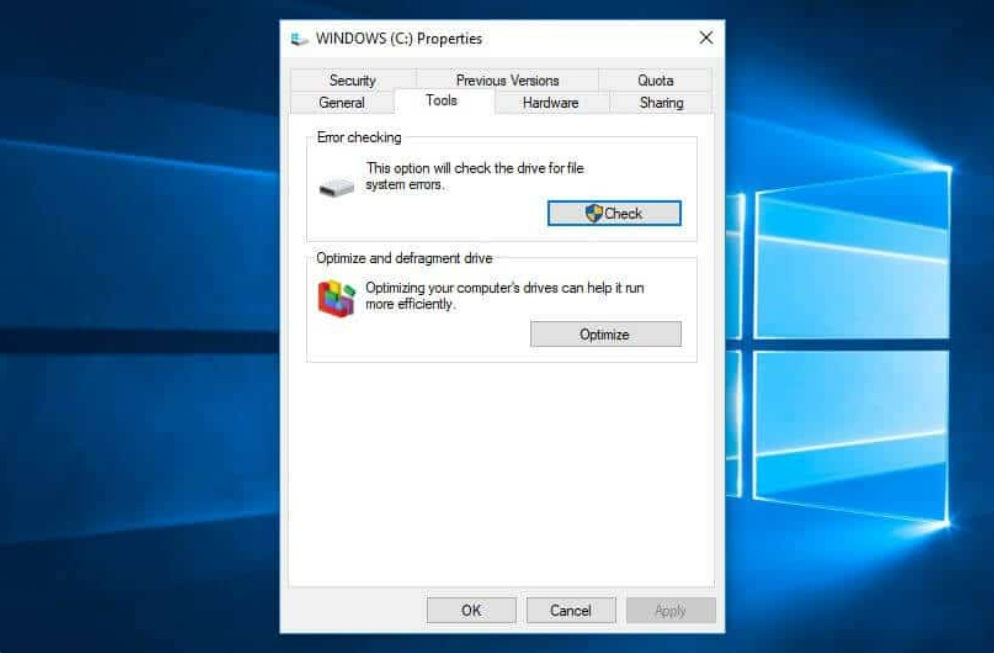
A new window appears. You can see your various drives and get information about their current status. Click on the one that needs work to highlight it, then hit the “Optimize” button on the window’s lower right corner. You can also click on “Analyze.” That feature will show you how fragmented the drive is.
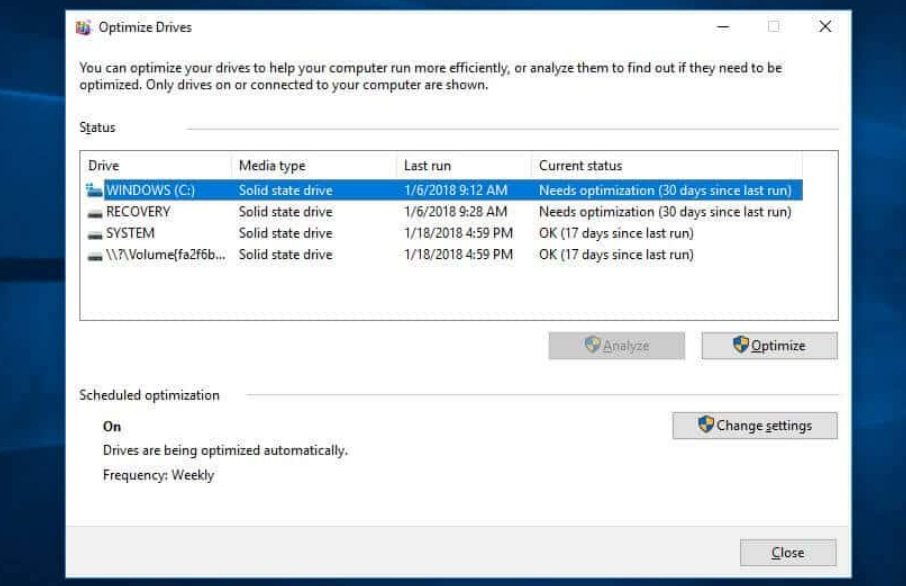
This process can take a while, so make sure you have plenty of time where you don’t need to use your laptop. To automate the process in the future, set a schedule! Windows lets you do just that with a few simple clicks.
17. Limit How Many Programs You Run Simultaneously
Here’s a tip that can prevent issues moving forwards. Even after your laptop starts running smoothly, try to limit how many programs you run simultaneously.
Multiple open programs will try to use the same finite resources you have. It can cause severe lag and a noticeable dip in performance. Laptops can only handle so much, so don’t push it!
18. Reinstall the Operating System
If all else fails, you might want to consider reinstalling the Windows operating system. This should be a last-ditch effort after troubleshooting and trying the previous tips.
Reinstallation can do a lot to eliminate unnecessary bloat. It gets rid of malware and fixes lasting problems you couldn’t resolve. It’s like starting fresh. Of course, it’s an arduous task, as you have to reinstall any software you have, too. But, you can use the opportunity to do things a bit differently.
19. Physically Clean Your Laptop
Is your laptop a bit dirty? No need to feel ashamed. Laptops are notorious for getting pretty gross. You take this device everywhere, so it’s exposed to a lot more than a desktop.
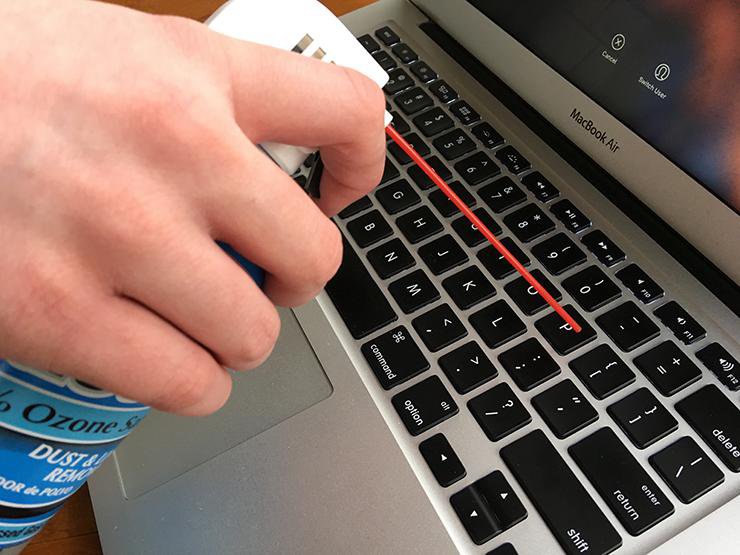
You might not realize it, but a filthy laptop could be the source of your problems. Accumulated dust and grime could prevent the fans from cooling those essential components. In turn, they become overheated and fail more often. Over time, physical dirt can even cause premature failure!
Make a habit of keeping your laptop clean. Use some canned air to blast away dirt. Pay close attention to the fan inlets, as those are the first parts to cause trouble.
20. Consider Replacing Some Hardware
The final tip we can give is to upgrade some of the hardware. Now, this technique isn’t free! You’ll have to pay for the hardware, but it can be significantly cheaper to make upgrades than buying a brand-new laptop.
The two main components you want to focus on are RAM and storage.
RAM stands for Random Access Memory. More ram gives you more resources to run applications and processes in the background. It directly correlates to performance speed. If you have an older device, getting more RAM can make a world of difference.
Now, not all laptops have accessible RAM, so you’ll want to do some research on your device before shelling out money for a RAM kit.
Another worthy upgrade is swapping out HDDs with SSDs. An SSD, or solid-state drive, doesn’t have any mechanical components. It operates on nonvolatile flash memory. That means it’s more reliable and accesses data much faster! An SSD can do a lot to speed up your laptop.
Speeding Up Your Slow Computer
Give these tips and tricks a try. Your computer is an ever-evolving system of digital files. While it might start out running lightning fast, using up storage space and running many programs simultaneously will slow things down. After you optimize performance, make a habit of cleaning your laptop.
Get rid of junk files and keep your system as light as possible. Once you master the art of maintaining your laptop, it can be a speed demon for years to come!


 And Make It Much Faster!)