
Author: Gerry Blackwell
Review Date: 7/17/2006
The cost and convenience of network attached storage (NAS) [define] keeps getting better and better. At $400, Western Digital’s breakthrough 500GB NetCenter Network Drive offers both superb value and easy set-up. It also comes with Retrospect Express 7.5 backup software from EMC, which is all the backup software most small businesses and consumers will ever need. The 500GB model is the latest addition to a line that includes 160, 250 and 320GB models.
NAS drives connect via Ethernet cable to a network router (including wireless routers) so that all the computers on the network can share the storage capacity. You can install Retrospect Express on each computer in your home or office and set up scheduled, automatic backups to the network drive for each. You can set up password protected (or unprotected) shares — folders in which you store files to be shared by a work group or the entire firm.
The NetCenter products also function as print servers. If you have printers attached to individual computers, you can make them available over the network, but print jobs then have to go through that computer and, if they’re big jobs, it may affect the computer’s performance. The NetCenter drive solves this problem. You can plug up to two printers into the unit’s USB 2.0 [define] ports and anyone on the network can install them as network printers and print to them. The USB ports can also be used to plug in USB hard drives.
The 500GB NetCenter holds its own against competitors on performance specifications — 7,200 revolutions per minute (RPM), a buffer size of16MB, nominal average latency of 4.20 ms and a read seek time of 8.7 ms. A new 500GB NAS drive from Maxtor, due out this fall, has similar specifications, for example.
Real life performance is more difficult to assess. Router and computer connect speeds as well as other factors obviously have an impact. I tested it with the Linksys Wireless-G Media Storage Link Router, a 100 megabits per second wireless Ethernet router, with my main test PC connected by Ethernet cable. Performance on backups appeared to be similar to backing up to a directly connected USB drive.
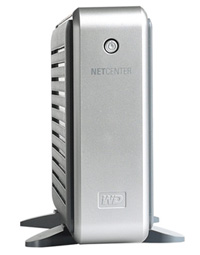
The 500GB unit is about the size of a 600-page hard cover book and not much heavier &3151; 5.9 x 9.4 x 2.2 in. and 3.35 lbs. It’s clearly not intended as a portable device, but is easy enough to move. It comes with two plastic feet that snap on the bottom so the unit can stand up on its long edge. Or you can lay it flat. Appearance probably isn’t a huge factor when choosing a NAS drive, but the NetCenter products are elegant looking with molded corners and two-tone silver and grey finish.
The unit comes with an AC power adapter with power cord, the plastic feet, an Ethernet cable, installation and Retrospect Express disks and a easy-to-follow Quick Install Guide. The full owner’s manual is available as a .pdf file on the installation disk. Controls and connections, as on most NAS products, are fairly simple. On the front, there’s a power button with power light behind it. On the rear surface, there are two USB 2.0 ports, an Ethernet port, DC power socket, reset button and Kensington security slot (for connecting a cable and lock).
Setup went smoothly. You connect this product to the router and power it up first, then install the included EasyLink setup software. It took a good two minutes for the unit to power up and acquire an IP address the first time, which was a little disconcerting. I wondered if there was something wrong with it. But eventually the orange power light turned to blue. At that point you can go ahead and install the EasyLink software on a computer attached to the network.
The EasyLink utility makes initial setup a little easier, a little more like installing a PC peripheral. With some NAS products, you have to open a browser and surf to the drive’s assigned IP address to access the configuration software, or go to My Network and double-click a file listed in a folder on the drive. EasyLink searches the network, finds the new NetCenter device and lets you assign a drive letter to the default Shared Files folder so it shows up in My Computer as a separate drive.
It also gives you access to NetCenter Manager, the full browser-based configuration program. If you need to access the configuration program again later, you can launch EasyLink from Start/All Programs. Or you can go to the NetCenter drive in My Network Places and double-click the shortcut that appears in the Configuration folder. This means that once the drive is set up, NetCenter Manager is available from any computer on the network, even if it doesn’t have EasyLink installed.
NetCenter Manager is a fairly intuitive browser-based program that lets you perform all configuration functions. On initial setup, you’ll want to make sure the time is set correctly and to the right time zone, and you’ll want to change the name of the workgroup from the default to whatever name you use on your network. This is also the place where you set a username and password for access to NetCenter Manager.
One option in the program’s General Setup section is to upgrade firmware. If you select it, the software goes out to the Internet and downloads and installs any available updates. This was all very straightforward, although after installing the update, the unit went through its power-up and connection routine, which took just as long the second time.
The main configuration functions are around file sharing. You can add a new shared folder, rename a folder, delete a folder and set security options. The NetCenter drive does not let you set up individual users or user groups with usernames and passwords as some NAS drives do. The only security is password protection of shared folders. If you designate the folder as private, the NetCenter Manager asks you to input a password and confirm it. Now when a user tries to access that folder, a standard Windows or Mac security dialog pops up requesting the password.
Setting up a network printer on a PC is simple. Plug the printer into a NetCenter USB port. Launch the Windows Add Printer wizard at Start/Settings/Printers and Faxes. Tell it you want to install a network printer and that you want to browse the network for available printers. The wizard will show you a list of printers, including the one attached to the NetCenter drive. Select it and tell the wizard to install. Unless it’s a brand new printer model, the driver software will probably already be on the computer – you can select it from a list. If not, you’ll have to find the software on a disk or download it from the manufacturer’s Web site and install it before completing the process.
The Retrospect Express software may not be the most full featured available, and it doesn’t allow you to backup some types of files — Outlook databases in particular — while the application is running or the file is being accessed by some other program. But it does let you set up incremental backups that create encrypted and compressed backup volumes you can use to recover in the event of a disaster. Or you can do duplicate backups that create a mirror image of a volume (a folder or drive) on the NetCenter drive, with individual files accessible at any time.
Whichever type of backup you choose, you can set up detailed scripts specifying source volume, types of files or selected files to be backed up, and schedules that trigger backups automatically at particular times and days of the week. Retrospect also provides detailed monitoring, logging and alerts so you can see if a script is performing properly.
I was already using an earlier version of Retrospect. I remember it being not easy at first to learn and use. Version 7.5 adds new wizards that simplify the scripting process — as long as you understand the basic concepts of backup.
Bottom line: This is the easiest to use NAS product I’ve tried. It performed flawlessly. There’s really not much else you can say.

