
When it comes to selling on your MacBook, or any other machine for that matter, I can’t stress enough how important it is to perform a factory reset first!
If you compare it to selling on or upgrading your phone. You wouldn’t just hand over your old one with all your photos, text messages and documents still intact and readable would you? No, so why would you do that with your MacBook?
A factory reset restores your MacBook to its original settings, erasing all your personal data, installed applications, and system preferences. It might sound like a dauting task to those of us that are not so tech savvy, ‘but what if I break it‘? But in reality, it’s much easier than you may think!
In this blog post, I will talk you through the reasons to factory reset a MacBook, the necessary preparations before resetting, what a factory reset entails, what it doesn’t do, and provide a step-by-step guide on how to perform the reset.

Before Factory Reset: Backup, Logout, and OS Version Check
Before proceeding with a factory reset, it’s essential to take a few precautionary steps.
Back Up:
First and foremost, create a backup of your MacBook’s data. You don’t want to lose your favorite photos or important files right? For best practices you should regularly back up your system anyway, but it is particularly important before performing a factory reset.
You can use Apple’s free Time Machine software, and create a complete backup on an external storage device. This is what I would recommend, as it is a completely offline backup, stored on a separate device. If you are only concerned with backing up your personal files and date, then you may wish to choose a cloud-based services like iCloud, OneDrive (previously SkyDrive), Google Drive or Dropbox to ensure your files are safely stored. A full system backup may exceed the storage you have available in your cloud account however, so keep this in mind.
Check Your MacBook Version
Depending on which version of the Mac, which chip and which OS you have installed, the backup process may vary. Newer version of MacBook that have an Apple Silicon chip, or an Intel version with the Apple T2 Security Chip, have a feature called Erase Assistant that runs an easy to follow process, including logging out of all your accounts. If your machine is using the Monterey operating system then the process is simple.
Older MacBooks, say pre 2018 that are using older Intel chips and older Mac Operating Systems like BigSur, or Catalina, will have a longer procedure with more steps, and this is the process I will cover in the post.
Log Out Of All Accounts:
It’s really important to log out of all your Apple accounts before you run a factory reset. What I mean by this, is your iCloud, iTunes, iMessage or equivalent accounts, and any other services linked to your MacBook.
This step prevents your personal information from being accessible to someone else. Remember to disable Find My Mac as well, as it requires your Apple ID to be disassociated from the device. The most important account to make sure you are logged out of is iCloud, as this disables the Apple Activation Lock on the reset Macbook.
What Does A Factory Reset Do?
In a nutshell, a factory reset wipes your MacBook clean, restoring it to its original state as if it just came out of the box. This process erases all your personal data, applications, and settings, ensuring your privacy and security. It’s important to note that a factory reset is irreversible, so be absolutely certain before proceeding.
When you perform a factory reset, your MacBook’s internal storage is formatted, effectively removing all files and data from the drive. The operating system and pre-installed applications are then reinstalled, returning your MacBook to its factory settings. This ensures that no residual data remains on the device, giving the new user a fresh start, or a clean slate.
It is the simplest way to ensure that when you sell on your old machine, you are not handing over your life story in the process!
What A Factory Reset Doesn’t Do
While a factory reset removes your personal data and restores the MacBook to its original state, it’s essential to understand what it doesn’t do. Contrary to popular belief, a factory reset does not permanently delete your data. Instead, it marks the space previously occupied by your files as ‘available for reuse’.
Although the average user won’t be able to recover this data, specialized tools or techniques might be able to retrieve it. If you need to ensure sensitive information is irretrievable, additional steps need to be taken to make sure recovery isn’t possible.
How To Factory Reset An Older Macbook – Step-By-Step
Performing a factory reset on a MacBook is relatively straightforward. Once you have backed up your data and signed out of your accounts, follow these steps to ensure a successful reset. These steps are for older OS versions including up to Big Sur (MacOS 11).
Restart your MacBook: Click on the Apple menu and choose Restart to initiate the process.
Enter Recovery Mode: When your MacBook restarts, hold down Command + R until the Apple logo or a spinning globe appears. Then from the menu that appears, select your language. On some devices you might not be asked to select a language, it may just go straight to the macOS Utilities menu.

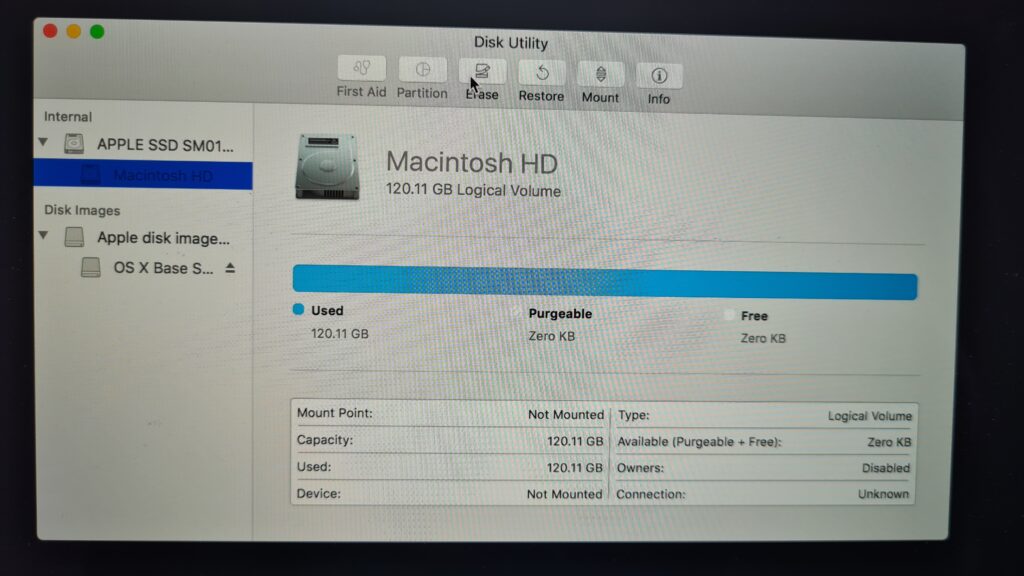
Access Disk Utility: In the macOS Utilities window, select Disk Utility and click Continue.
Choose your startup disk: In the next window that appears, from the sidebar, select your startup disk (this will be under internal) and click on the “Erase” tab.
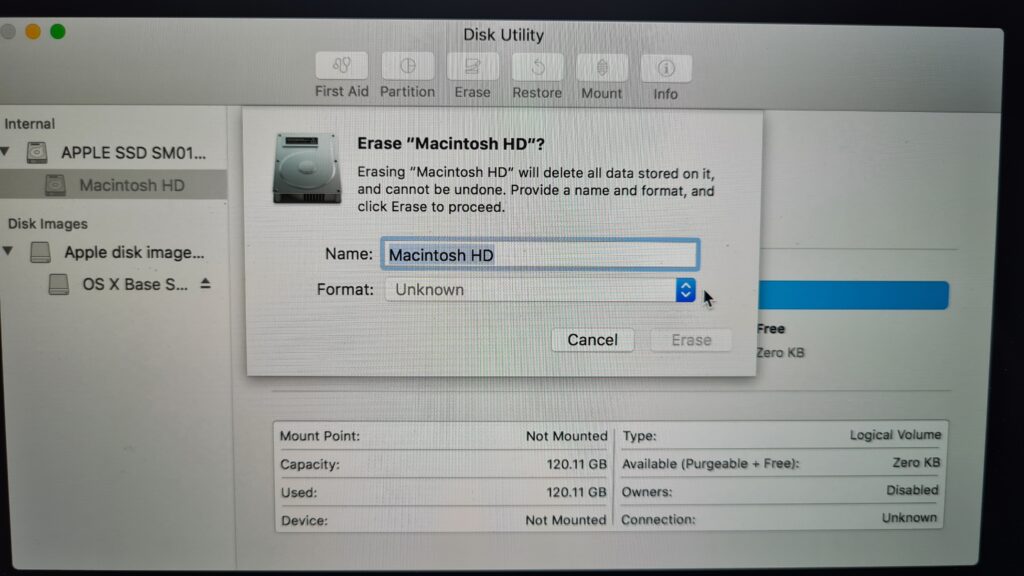
Perform disk erasure: Select the format type as APFS or Mac OS Extended (Journaled), give your disk a name, and click on Erase. Confirm your action when prompted.
I recommend choosing Mac OS Extended (Journaled) as this is more comprehensive with reverse compatibility, so it is more suitable for older operating system versions. APFS is a quicker formatting option but is suitable mostly for SSD and Flash Drives.
Exit Disk Utility: Once the erasure is complete, click ‘done’ to close Disk Utility and return to the macOS Utilities window. You may have to select ‘exit disk utility’ from the top bar menu to do this on some older versions. Before you move onto the next step, make sure you are connected to the Wi-Fi and if not, then make sure you do before continuing.
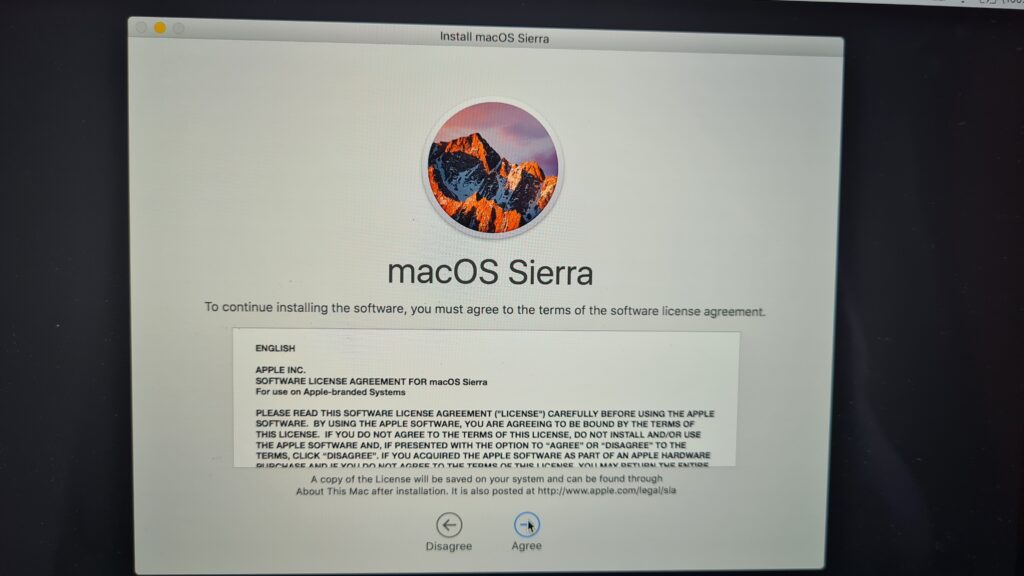
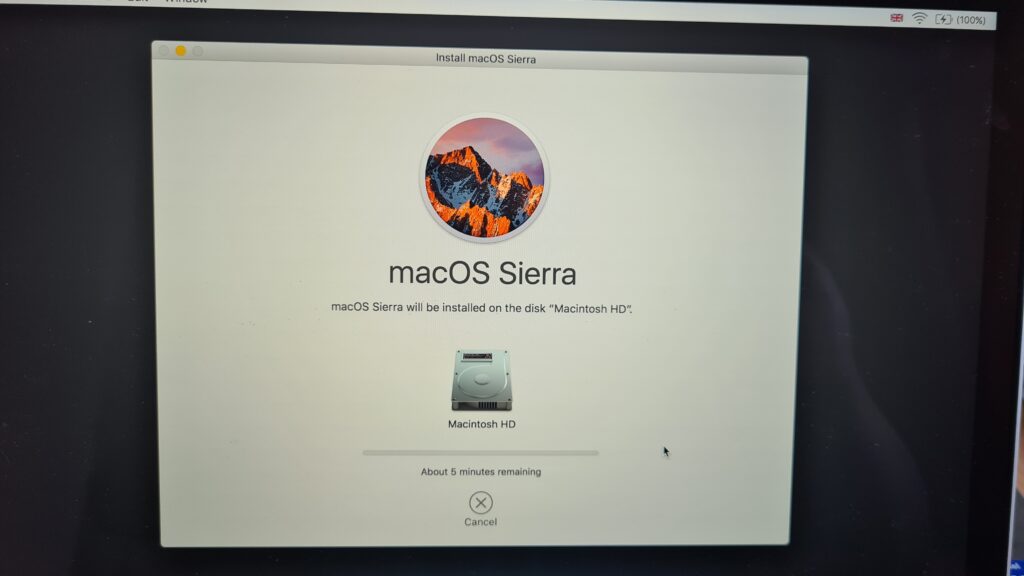
Reinstall macOS: Select the “Reinstall macOS” option and click Continue. Read and agree to the Software Licence Agreement, then follow the on-screen instructions to reinstall the operating system on your MacBook.
If you are selling or returning the MacBook then that’s you done. The next step is for setting up the MacBook following a reset, and the final step if for either the new or existing owner to restore their data to the machine.
Set up your MacBook: After the reinstallation process is complete, your MacBook will restart. Follow the initial setup prompts to configure your preferences, language, user account, and other settings.
Restore your data: If you created a backup, you can now restore your data using Time Machine or other backup solutions.
How To Factory Reset A Macbook Using Sonoma, Ventura or Monterey OS.
These steps are for newer MacBooks using either the Monterey (macOS 12), Ventura (macOC 13) or the very latest Sonoma (macOS 14) systems. The steps for these OS, using the Apple T2 Security Chip is much simpler.
System Settings: Click on the Apple Logo at the top left of the screen, and from the drop down menu that appears, select System Settings.
Opening Erase Assistant: In Monterey OS, you should see an option in the drop down menu for system settings, that says ‘erase all contents and settings‘, click on this option.
In Ventura OS, it may be slightly different. In the system settings menu, you select ‘general‘ from the drop down, then chose the option ‘transfer or reset‘, and then you can chose the option for ‘erase all content and settings‘.
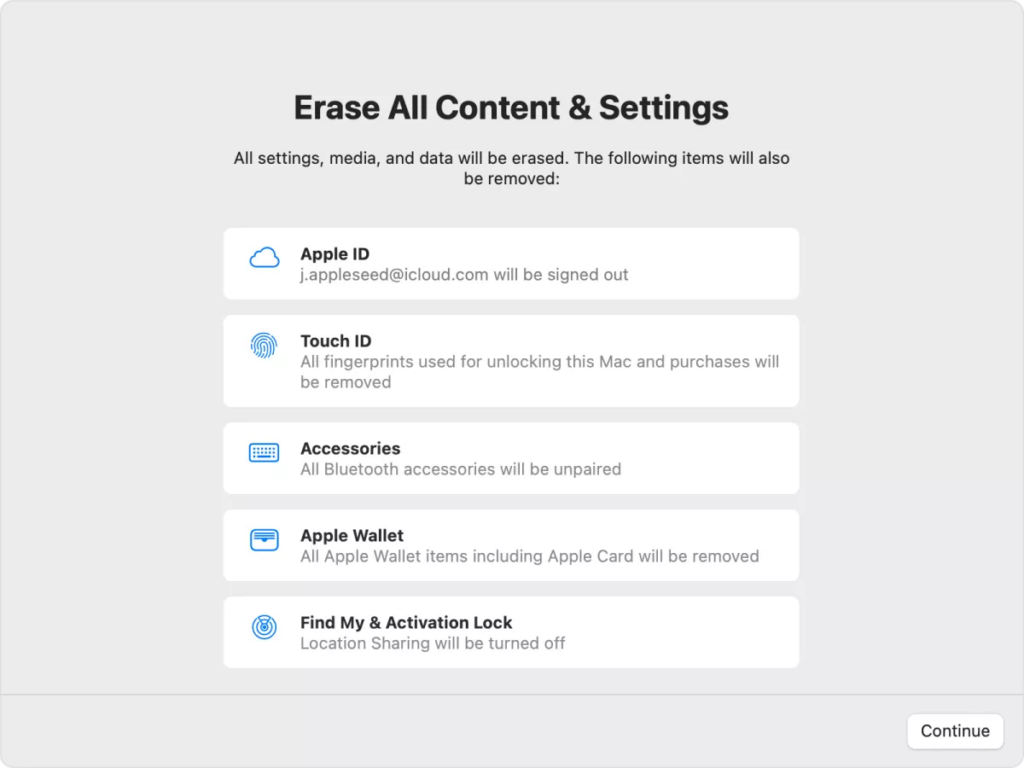
Using Erase Assistant: You will now see the Erase Assistant window, which will talk you through the factory reset process step by step. It will first give you the option to create a Time Machine backup before continuing. The assistant will take you through logging out of your iCloud account as part of the process, as well as signing out of Find My and Activation Lock so you don’t need to worry about doing that first following this process.
When you have backed up (if doing so) and are ready to continue press, the button and you will be presented with one final window, asking if you are sure you want to proceed. You will need to put in your Apple ID credentials and confirm you want to erase. Then that’s you done! The reset will start.
Is It The Same Process For A MacBook Air?
Yes, factory resetting a MacBook Air is done following the exact same steps. One of the two processes above will work on your MacBook Air, depending on how old it is. Older machines will need to follow the longer process.
And that’s it! Your MacBook is now as good as new. Remember, if you’re selling your MacBook, you don’t need to worry about the new owner getting into your files or apps. If you’re keeping it, just follow the prompts as if you were setting up your MacBook for the first time.


")